For all my hose

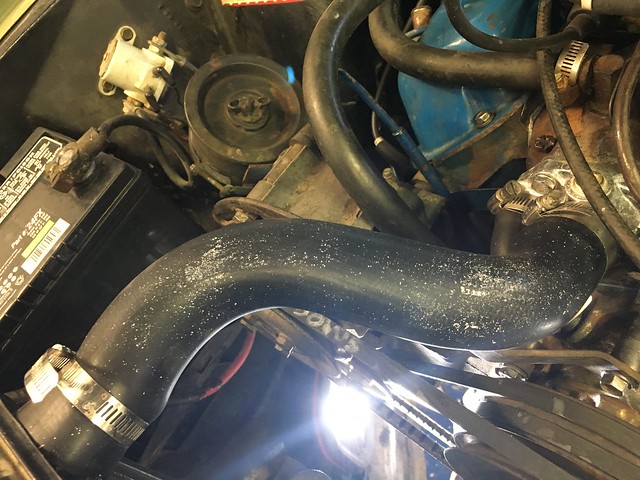
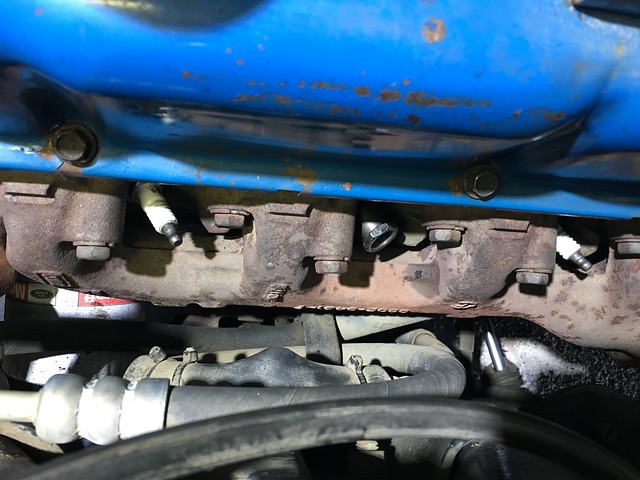
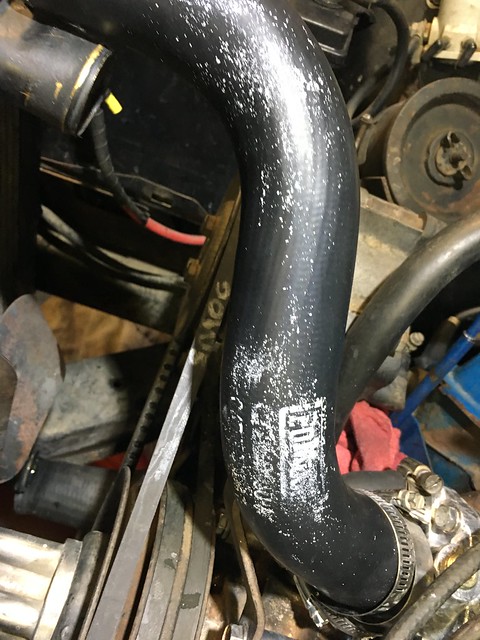
I’ve really soured on reproduction parts.  Particularly Scott Drake parts.  The few I’ve purchased are crap.  The function is fine but the finish and fit leaves a lot to be desired.  Particularly for the price.  The latest disappointment/debacle    (and the last time I get that brand if I can help it) is with the radiator hoses.  Rather than get plain old Gates from NAPA or Rock I opted to spring a few bucks more for labeled reproduction parts.   Labeling that was fubar even before I opened the package.

Not any better as I installed them,

And still worse…


I’m sure CJ would have made it right and taken them back before I put them on but that’s besides the point.  I like the vendor but they carry so much Drake it’s going to be difficult to get some things from them.  At this point it’s a driver.  I wanted to make it period correct appearing but those parts many times are junk.  The hose in this case seems good quality, thick, stout molding but I can get the same thing from a Gates or Dayco.

Hot, hot, hot like Buster Poindexter

Uncle! It’s getting too hot to get a lot done in the shop (my wife still calls it our garage) to do much work for long periods without coming in to cool off. Ironic for working on the cooling system. I’ll probably want to get one of those magnetic usb/battery powered fan/clock/thermometer off the truck to use in addition to the big fan and a porta cool. The alternative is not to work on the car(s) and that’s not going to happen. With that I decided to ditch the whole thing, get a high flow water pump, yuuge 40 gallon radiator, 10″ hoses, 2 x 4000 CFM fans and coolant made from unobtainium so I could cool my stock 200 hp engine. Naw, not really…

Done. Works well, car still runs well. It’s got some leaks. Each end of the top and bottom radiator hoses leak. Imagine that, near 20 year old rubber hoses that sat for 11 years then had corrosive back flush solution run through them have started to leak. Who’d a thunk? I was originally going to order the hoses with the rest of the parts for the refurb but thought if there was a chance I was going to have to tear the whole thing down right now anyway I didn’t exactly need new radiator hoses. And I’ll need to the get the original style clamps to be period correct. And the radiator drain seal has failed and it leaks too. I’d say that’s pretty minor in the big picture, as long as I get them fixed and not really drive it until then.

When you’re replacing classic or even older parts with current replacement parts there are bound to be some differences. We see this in the production cars that are converted to race cars/trucks and pre runners. In those cases there isn’t the mandate to maintain a period correct vehicle and many of those parts are modified, fabricated or from other like uses in that make.

The lower cost generic thermostat housing/outlet is the same Four Seasons aftermarket that Rock Auto sells. It’s also thicker at the mounting boss/bolt hole than the original or the 87 Ford part that was on the car.
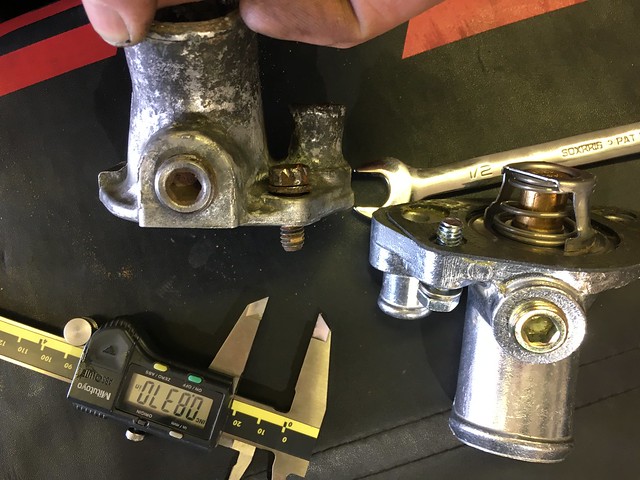
With the wear, previous leaks and rust the existing bolts that came off the part and the new bolts I replaced them with weren’t long enough to catch enough threads. The originals were too hammered to use again anyway. The one that didn’t have the rounded head was caked with corrosion and hardened rust. IOW metallurgy happened.
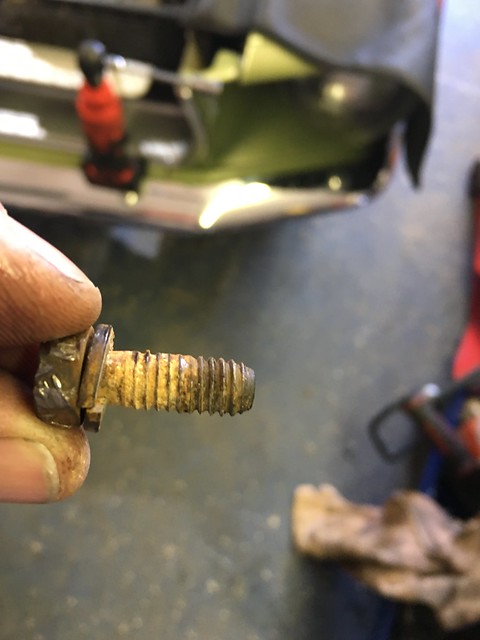
To get a match that would work on the new part for the bolt length the replacements are going to need to go another 1/4″ or so into the manifold thread. The hole is plenty deep it just won’t allow the threads to run down that far. I only chased them to about what I needed for the shorter bolts. Now I have to chase the rest. I use a cutting tap for this because it’s hardened and corroded. In fact I rarely use a chaser and have never had any issues damaging existing threads. A chaser also won’t recut a stripped start of a tapped hole. Here’s what I pulled out of the top hole.
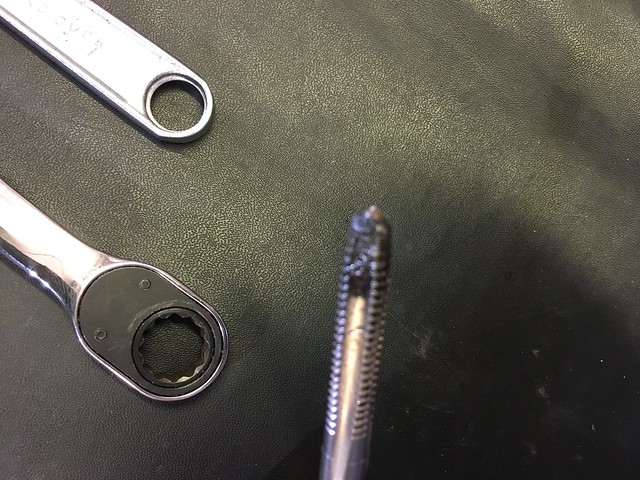
The bottom hole is harder to get to. Since the entry wasn’t stripped I could use a bolt. The chaser I have for that size is too long. I chased them when the manifold was off so clearance wasn’t an issue. I used Rapid Tap and ran the bolt in and out using a ratcheting combination wrench then blowing the gunk out of it.
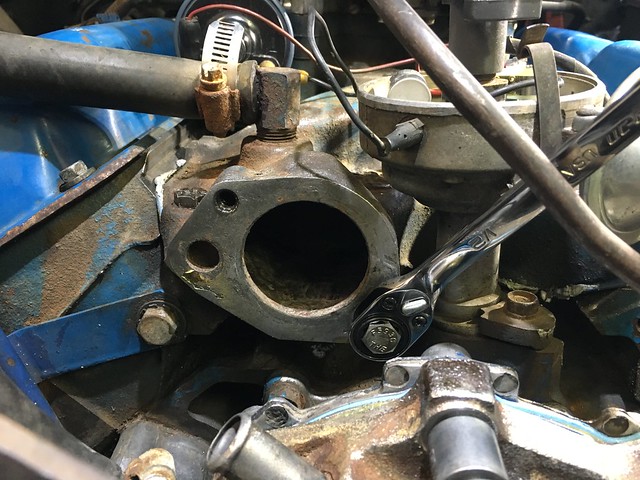
Mounted and torqued.
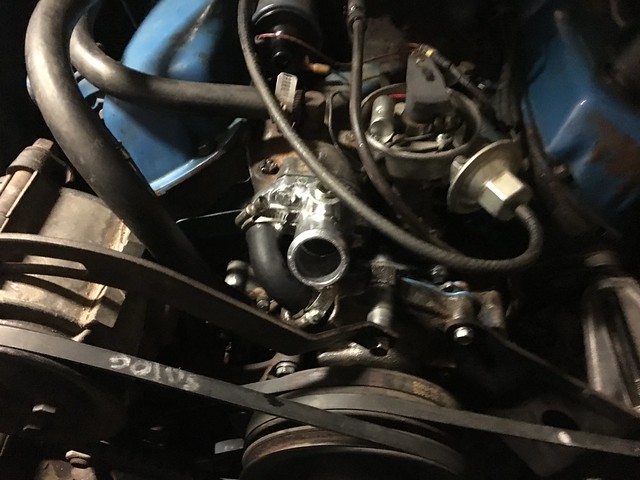
If you are doing big engines or are a pro shop you’re likely using a pressure filler so you don’t get air pockets in the cooling system during a fill. I don’t do it enough to justify it though when I was racing the water/water wetter came out after every race, sometimes during an event we had to do it to work on the engine or during tech. These days not so much. You can “burp” the air from your cooling system on fill using a jack.

How I do it is jack the car up, radiator cap removed so the filler neck is the highest point of the cooling system.
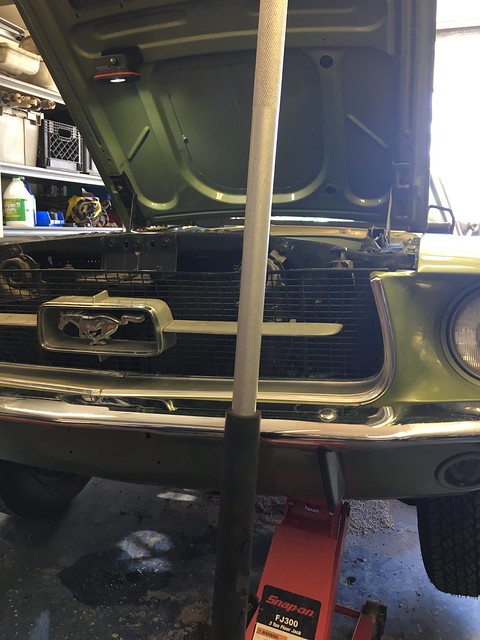
I top up the system with water only until I know there are no leaks either inside or outside the engine. I start the car and let it run for a few minutes. During the run I add water as it lowers in the radiator. When the radiator no longer needs water I watch it and can see air releasing from the system. Don’t let it run too much longer than you need to release the air or I will start to run over as it gets hotter. At that point I cap it, drop the jack, check for leaks then do a road test. After the test I make sure the water is still more or less topped up. If it’s not it means there is either a leak, you didn’t get all the air out and had a larger pocket or it’s leaking into the engine. You can check to see if it’s leaking into the oil by reading the dip stick and looking for that blueish sheen in the oil or in the radiator. If so you’re going to need to figure out where it’s coming from because it can tank your engine.

After I got a mile or so on it I brought it back in for some thermal images. Remember from the last time the images showed massive heat at the thermostat housing/outlet. It looks better this time, not as much heat trapped at the base of the housing. That’s in an ambient temp over 110* F. When you look at the contrast as well it doesn’t seem to be as much heat soak into parts around the cooling system.
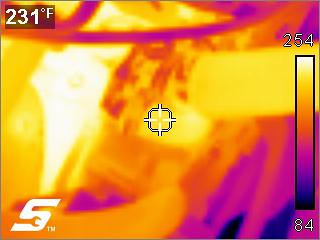
Except for some leaky hoses mission accomplished. Other than the hoses the next thing will be the power steering rebuild and suspension refresh.

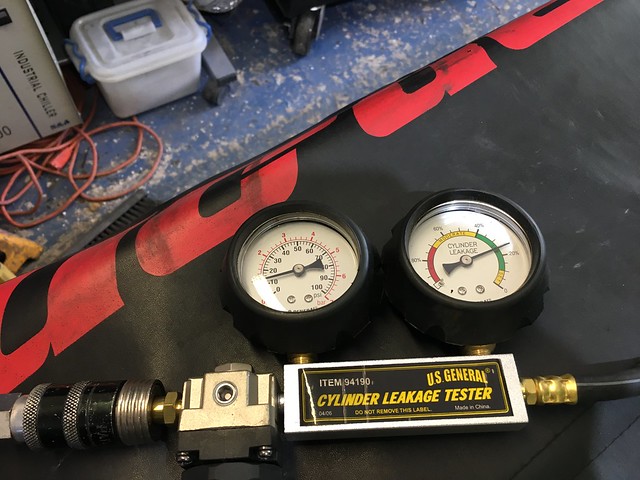
And now the leak down test

Woohoo!

Leak down done but first let’s do the numbers…

108 temperature when I was doing the leak down test today

111 temperature when I’ll be reinstalling the new cooling system parts and firing up the car again

15 gallons of water through the swamp cooler during the day

2 gallons of water through the swamp mechanic during the day

4 trips to McFadden Dale or NAPA during this part of the project

3 things I needed off the tool truck that weren’t in stock

2 orders from Mustang specific supply houses

1 order from Rock Auto

3 number of fasteners that needed thread repair

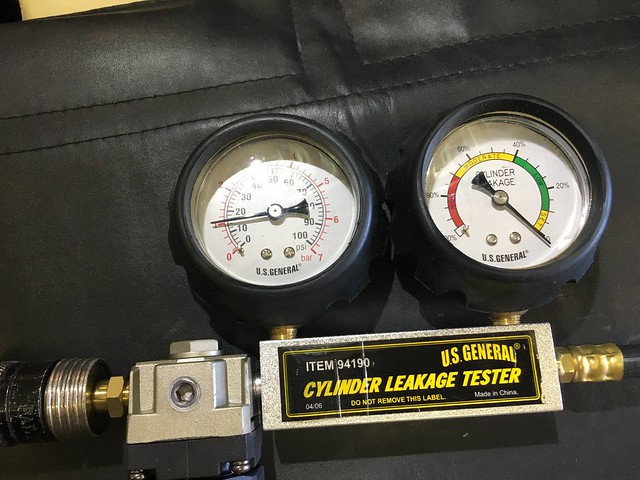
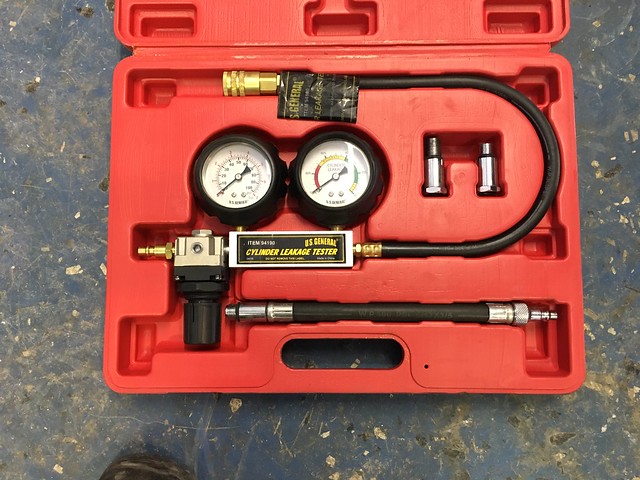
I’m not so sure about the leak down tool. It’s kind of tweaky setting the zero point. Much tweakier than I remember but it’s been a couple years since I’ve done the diagnostic. The couple of engines I did in the meantime (one of the is still mostly in parts delayed by getting the Mustang) came in and were stripped down and sent to the machine shop when they got here. Not tweaky enough to pay the big bucks for the truck tool or even a good brand from the online tool guys. I’m not going to be using it for absolute measurements but for comparisons to the other cylinders.

Installed my adapter from yesterdays post

Calibrate
I’m only testing a few holes, the two that showed the most issues in the compression test, #1 and #5 and random test of another to validate the first two.

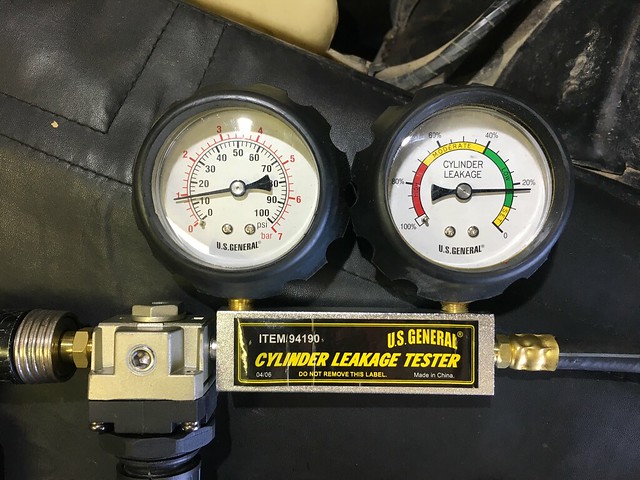
Test of #5. It’s the one with the best compression specs of the bunch but the most carboned plug. Just as I suspected, leak in the intake valve and rings. Sounded stronger in the dipstick hole than the carb. Exhaust and cooling good. It’s got to be more than the percentage shown but still enough to want to rebuild after the summer.

Here’s #1. It’s a bit hammered. Big leaks from the rings and exhaust. The head gaskets seem good all around. Will be interesting to see if that heat signature from the cooling diagnosis was part of damaging that cylinder. It was the weakest one by far. My guy measures all the cylinders (and I do before I send them in) before he calls with the news on what needs to be done. I’m sure this one looks nothing like the rust bucket of an Olds 350 I took in some years back and he was able to pep that one up.

The random cylinder tested a bit better than #5. No valve leaks to speak of but a definite ring leak.

With that I’ll back burner the rebuild as originally intended. I can’t paint now until Sept, too hot. The catalysts won’t cure properly. I’m going to refresh the engine bay, suspension, the whole shebang once it gets cool enough to paint again. Meanwhile I’ll get it back on the road then focus on the the steering system rebuild.

The leak down adapter

Was hoping to leak down today but…

My HF leak down kit has no adapter for the olde tyme plugs. (that would be 18 mm for those keeping score) It’s not a bad kit, available and affordable. It can only take about 15 psi before the leak down gauge freaks out. The good ones can do 100 psi. They are also quite a bit more money. I did the Miata and Ranger with this one and it worked fine. Because 14 mm plugs. I did at least one of the hobby stocks with one I borrowed from the truck at the time which was eons ago.

No adapter so I start calling and looking. Nothing on the truck, he can order but knows the thread size on the HF hose isn’t the same as the SO hose so that will require hose and adapter. Maybe and air fitting as well. And he doesn’t have one on the truck to borrow. Amazon yes. Three piece, under $15 two day shipping. NAPA, no. Chain parts stores don’t have one to loan.

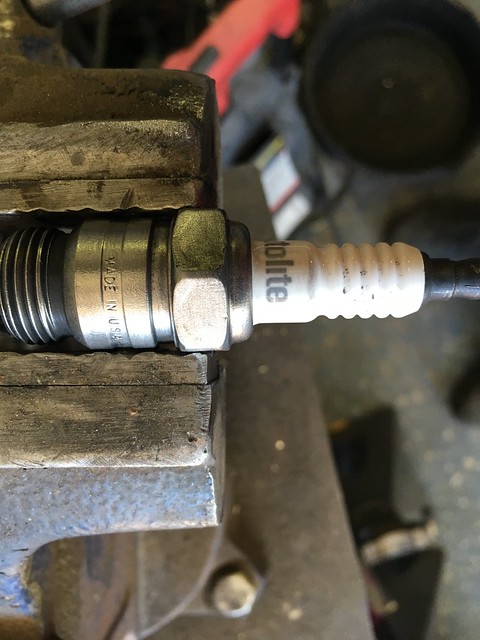
I think I’ll make one out of a spark plug. I don’t want to butcher one of my new ones. I dig through one of the trash cans in the shop to find the old rusty plugs that were in the car.

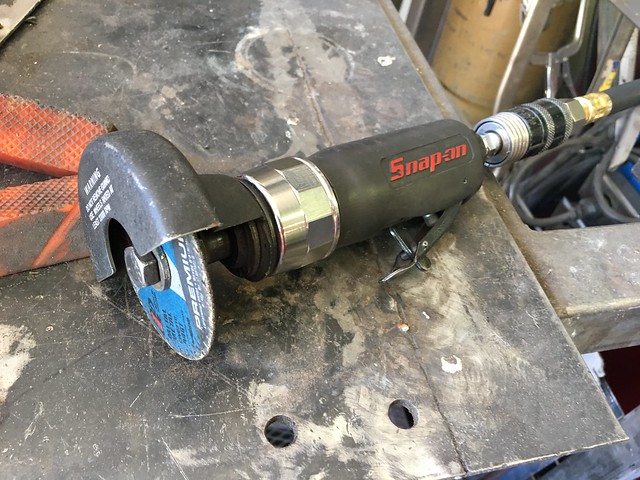
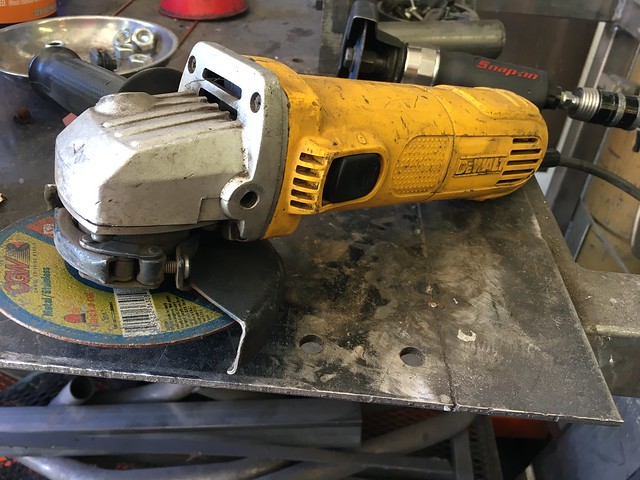
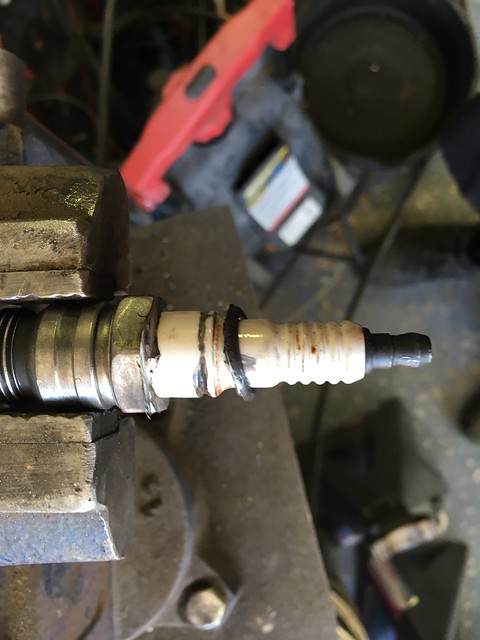
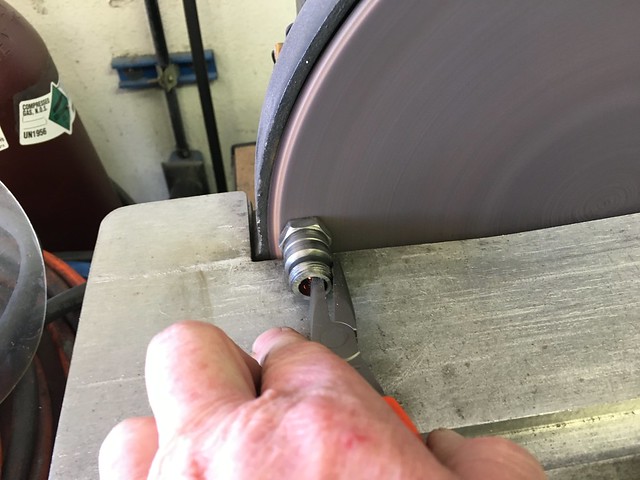
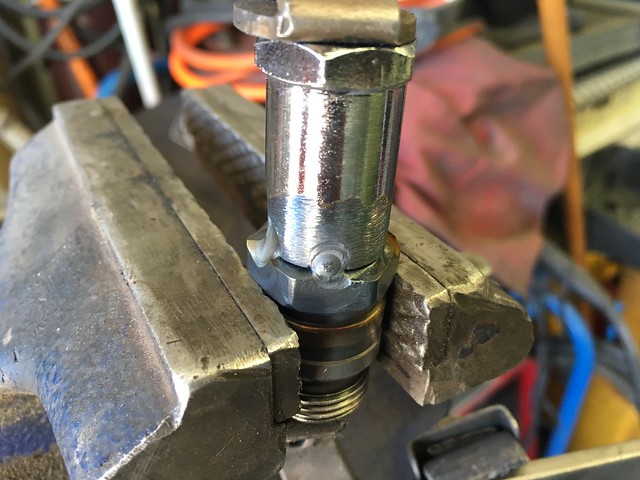
Gonna need to cut that neck off to get the porcelain out. Hopefully I’ll be able to cut some 14mm threads in the plug carcass. I’ll use Mr. 3″ cut off wheel. One of my go to tools for this kind of thing.

If you don’t have a compressor or much of a need for a specific cut off tool I recommend an electric angle grinder. Having one is a must have for any toolbox. It’s versatile, can cut, grind, brush, sand. Those that fab all the time have at least four to six each with a different wheel so you don’t have to change or different sizes and the like. I’ve had this Dewalt for 8-10 years, rebuilt once. I’ve got about half dozen angle grinders of various sizes, mostly this kind of Dewalt. The HF grinders, even the older one’s work well. I had one for a few years using it regularly until it burned up. The new ones are supposed to be pretty good.

Shoulder removed and ready to separate.

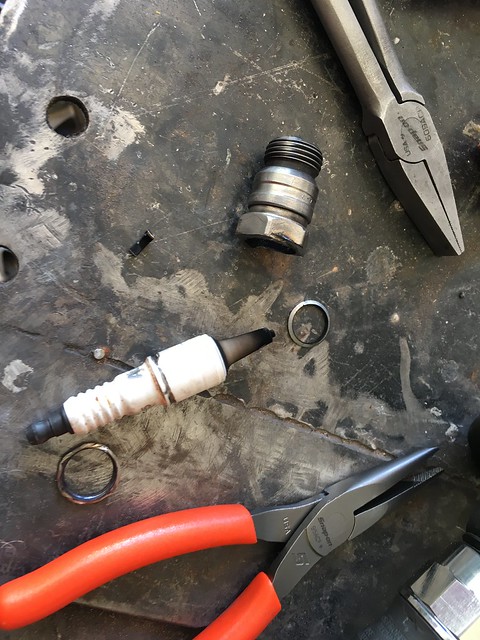
Just pull it out. Grind the electrode contact off and we have a core.

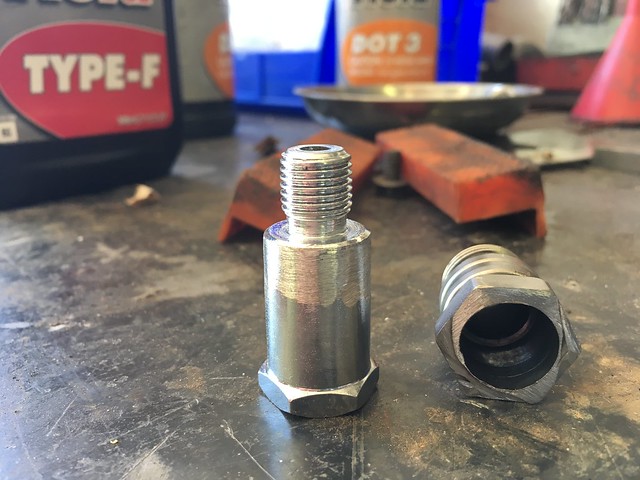
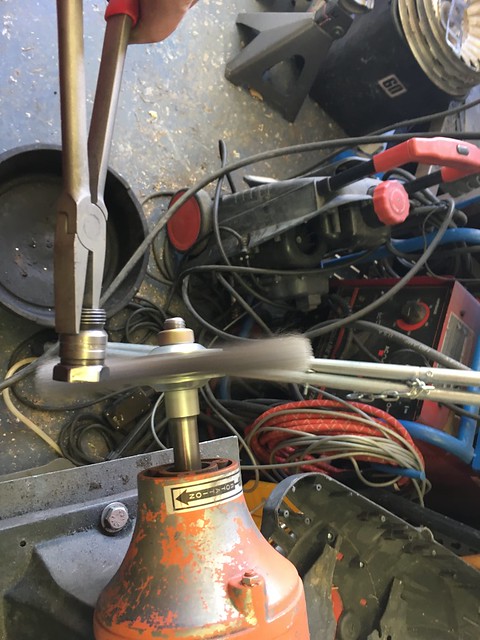
No joy for threading another adapter or even general air fitting. So what to do? Weld in the smaller adapter in the kit I’ve never used. First I need to grind the chrome off the part. It’s hard to weld and the fumes are hazardous. Then I need to clean up the plug fitting so they’ll cleanly weld.

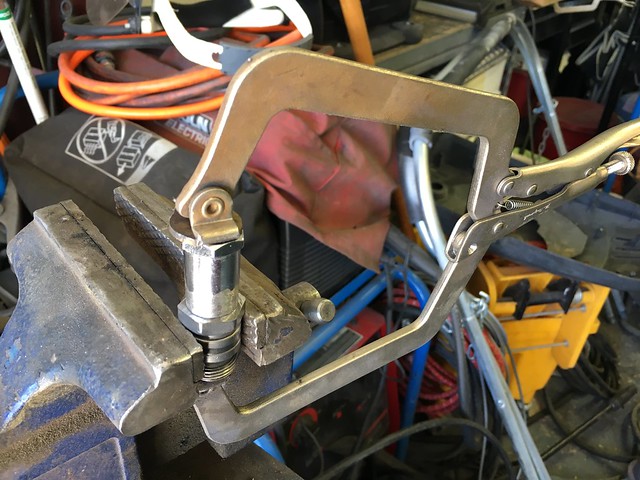
It’s cleaned up, washed with acetone and ready to be fixtured.

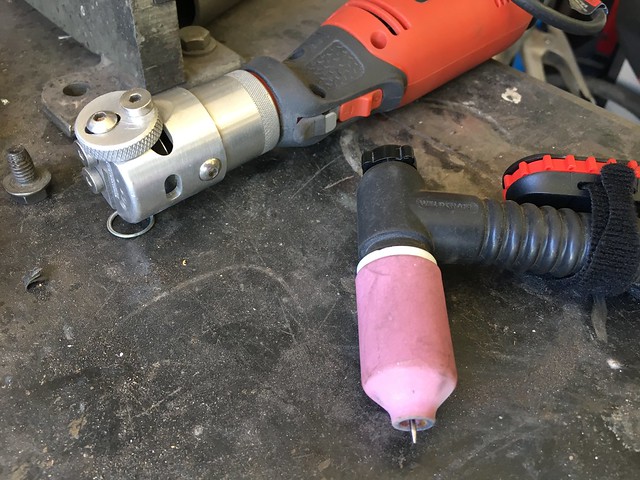
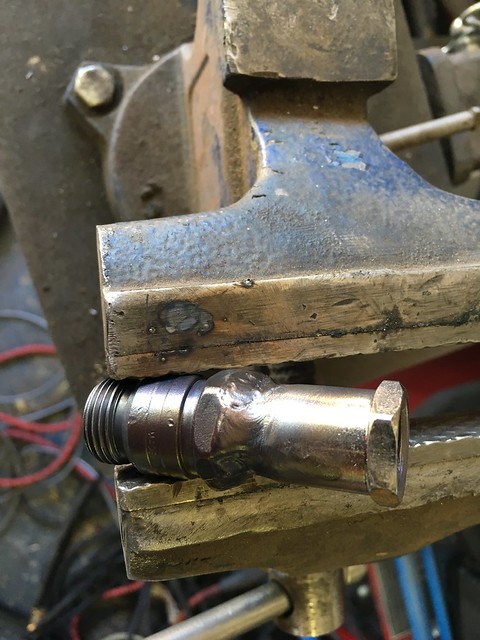
I’ll weld this one using the TIG process. Need to prep a tungsten, I use gold for this (1.5% lanthanated) and ER70S2 filler because that’s what I had in front of me, argon and DC- at 125 amps.

Tack it all four sides before the finish pass. That’s a standard way to join tubing.

Now for the finish pass. Not my best work. The small diameter and the thick wall tested my ability on this one. Not the cleanest but it will work.

I now have an adapter but I’m out of time in the shop today. Had to skeedaddle to my day gig.

I’ll get to the leak down tomorrow and hopefully finish before my cooling system parts get here.

On to compression and leak down testing

The thermostat housing mystery is solved. Turns out it’s not really a mystery. It’s a part from a 1987 Ford V8 used in F150, Bronco and Country Squire station wagons. I’m sure there are other old guys here that remember those. When I was in second grade we had a Chrysler Town and Country station wagon. Complete with fake wood grain.

I finally decoded the part number by realizing the second character is a numeric and not an alpha. Looking at the Drake reproduction for the car the pic at CJ had the 64-65 part number. A gander at Mannel shows the right casting numbers per year with pics. I’m still learning how to use the appendix in Mannel to see which parts span multiple years. For example in the section on your engine there might not be any specific info on that part if it were used in a prior year. Many times, probably most times, there is a reference to using the same part as previous years. To find which years you go to the appendix for that type of part and there will be a chart with both casting numbers and engineering numbers and a reference to a pic of that part.

I went ahead and got the replacement that wasn’t period correct but had the threaded boss for another water temp sender. (and they had the engine assembly manual in stock now so I picked that up as well) After I ordered as I was looking at the old setup I realized that the location of the new sender would be on the wrong side of the thermostat. When the thermostat was closed or failed you wouldn’t get a proper temp. I’ll tee off the heater hose outlet for the new/additional sender. I want to keep the stock gauges in the dash for historical purposes and stealth the modern gauge in the cab where it’s not so easily noticeable. You’ll look in the car and think “oh that’s a stock interior” but there will be a somewhat hidden water temp and oil pressure. If the repros have the correct casting number I’ll pick one up otherwise I’ll leave the replacement in.

Hopefully my parts will be here Weds just in time for me to finish the engine testing. Today I did compression tests, both wet and dry on each cylinder. There are tons of places that you can get instructions for the test. You can get the gauge as a loaner at the parts store or pretty inexpensive at Harbor Freight. You don’t need tool truck tools, just a plug wrench, the gauge and a way to get a bit of oil into the cylinder. It’s an easy test that will get you good info from your engine. Google it for some good tutorials.

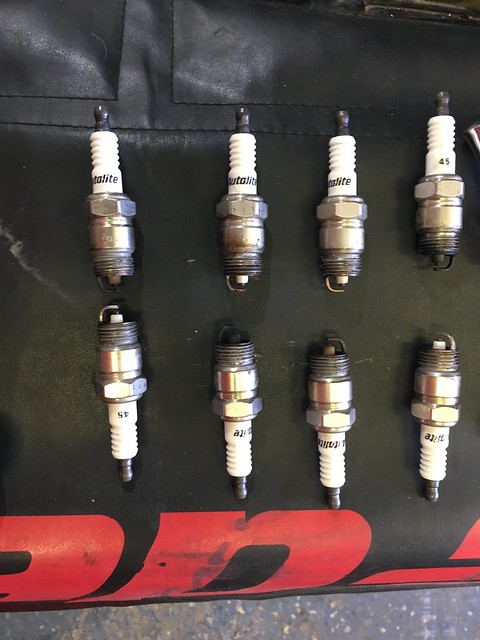
Here are what the plugs look like after about 50-60 miles of running. You can tell a good deal of how your engine is running by “reading” the plugs. Cylinder six is really fouled. Something is going on there. After this few miles you’d want them to look like the plugs where you can still see white on the insulator. Those others shouldn’t be that dirty with only 60 miles or so on them.

The cylinder numbers are 1-4 left to right on the upper row and 5-8 on the lower row as you look at the pic.

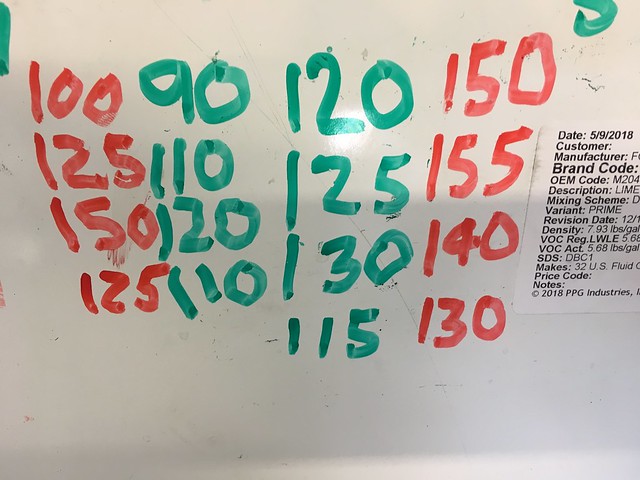
Here’s the results of the compression test. A couple of interesting findings, perhaps related to the heat buildup I saw in the thermal imaging and the history of the car running hot and sometimes overheating. And maybe even that noisy lifter. The layout of the results on my whiteboard is a bit confusing as it doesn’t map to the locations directly as you look at it. Green is the dry test, red is the wet test. You do the dry tests first then move to the wet test. The wet test is the same as the dry except for putting a bit of oil in the cylinder to see how much better, if any, that it seals. The wet test should show an increase in compression unless there is an issue in the valve train. The FSM calls for 130-170 psi at sea level.

Here is an ASE study guide on wet compression testing. https://www.freeasestudyguides.com/c…cting-oil.html

Left hand side is 1-4 top to bottom, right hand side 5-8 top to bottom. (the sticker on the extreme right is the can sticker from PPG Deltron DBC Lime Gold paint)

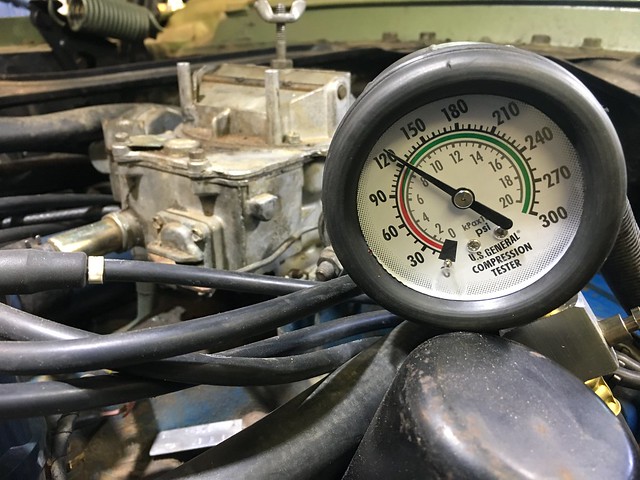
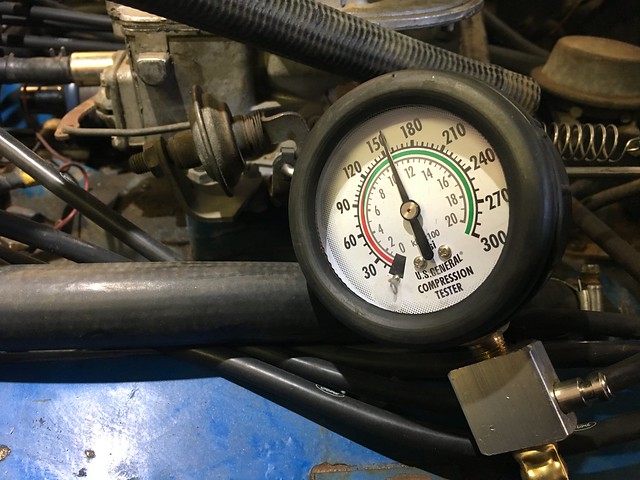
This is hole number 6 dry test, the one with all the carbon

The wet test of number 6

Most of it shows a 51 year old engine that has 125,000 miles on it. There are a few things that stand out and need to be investigated further. There are things that point to rebuilding it sooner rather than later but no show stoppers. At least right now. Numbers one and five are the most out of line.

Hole number one readings are in bad shape. I checked it a few times. A reading of 90 is bad news. Only going up 10 psi in a wet test makes it worse. The plug is a bit burnt but not saturated in carbon like number six. It could be too lean. What we will start to look at is extreme wear in that hole due to heat buildup near that part of the block and damage to the valve train on that hole. Six has a great deal of carbon. It may be the intake valve isn’t seating or is stuck partially open. It’s got the best compression readings wet and dry. It’s important not too assume too much at this point until we crack it open, measure and inspect it.

Tuesday will be leak down test day.